Posts

Showing posts from November, 2023

An Anti-fogging Glass

A young girl named Maya lived in the centre of a busy city, where skyscrapers kissed the clouds and life rang in every alley. Maya had always been drawn to the city's colourful vitality, but she had one recurring issue that made life difficult for her: her glasses would frequently fog up. Since she was a young child, Maya has been nearsighted. Although she accepted her glasses as a distinctive piece of jewellery, the fogging problem bothered her all the time. Her eyesight became blurry, making it difficult to see the rich features of the city she adored, whether she was walking out of her apartment into the cool morning air. Due to this, she even decided to operate her eyes which was very expensive.  But, one day in a morning, Maya made the decision to check out a neighbouring eyeglasses shop that a friend had told her about. Hidden in a little nook, the store didn't look like much, but it might be the key to solving Maya's nagging issue. Maya entered and was greeted by Sa...

Running MPU-92/65 sensor with Arduino to Measure Real time Temperature

Image
 Week 6, November 1 Things you need; - An Arduino connected with computer - MPU-9250 Sensor - F-M Dupont wire Connection of Wires - Connect black wire to Gnd of both arduino and sensor - Connect a red wire to vcc of sensor and 5v of arduino - Connect a SCL wire to A5 of arduino - Connect SDA wire to A4 - Connect INT wire to 2   CODE TO RUN THE PROGRAM By running this code, we can find the real time temperature

Running a Micro Servo and Sonar with Arduino Uno

Image
 Week 5, 25th October Things you need: An Arduino Uno connected with computer, Three wires black, red and yellow, And a micro servo. How to connect wires: - Connect red wire also known as power wire to 5V of Arduino. - Connect black wire to ground pin (Gnd) of Arduino. - And connect yellow wire to digital pin 9 of Arduino. The code to run a micro servo # include <Servo.h> Servo myservo; //create servo object to control a servo // twelve servo objects can be created on most boards int pos=0; //variable to store the servo position void setup() { myservo.attach(9); //attaches the servo on pin 9 to the servo object } void loop () { for (pos=0; pos <=90; pos+=1) {//goes from 0 degree to 180 degree // in steps of 1 degree myservo.write(pos); //tell servo to go to position in variable 'pos' delay(15);     // wait 15 ms for servo to reach the position } for(pos=180; pos>=0; pos-=1) {// goes frm 180 to 0 degree myservo.write(pos);   //tell servo to go to...

Building a MIDI Instrument

Image
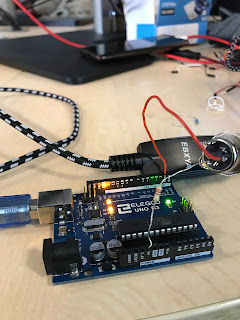
MIDI (Musical Instrument Digital Interface) is a standard used for transmitting musical data between electronic devices. It allows instruments, computers and other devices to communicate with each other and to control various aspects of music such as notes, pitch, velocity and more. Information on the standard set by the MMA (MIDI Manufactures Association) can be found on this link MIDI.org – Expanding, promoting, and protecting MIDI technology for the benefit of artists and musicians around the world. There are also other Standards like; 1. USB(United Serial Bus) which is a standard interface used for connecting peripherals to computers and other devices. It allows for plug and play functionality and supports data transfer. 2. JPEG(Joint Photographic Experts Group) is a standard image compression format commonly used for storing and transferring digital images. 3. TCP/ IP(Transmission Control Protocol/ Internet Protocol) is a set of communication protocols used for connecting devices ...

Introduction to Arduino Uno

Image
  In our third week lab we studied about Arduino Uno. The Arduino Uno is an open-source microcontroller board based on the Microchip ATmega328P microcontroller (MCU) and developed by Arduino.cc and initially released in 2010. The microcontroller board is equipped with sets of digital and analog input/output (I/O) pins that may be interfaced to various expansion boards (shields) and other circuits. To run the code or to do test we need some hardware components like - Arduino Uno - Breadboards - Wires - USB Cable - Transducers The Arduino Uno consists of USB port to computer, reset button, clock, microcontroller, inputs and outputs. The first test was "Blink test" where we have to connect wires to uno and have to run some codes to test whether it becomes successful or not. How it works -First we have to connect arduino uno with computer by USB, -Then connect black, white and red wires in arduino uno and breadboards, -Connect red wire in A5 in arduino uno and 30e in breadboard,...